I’ll show you how to bring your spouse to the U.S. It is, surprisingly, very complicated.
Are you an international couple and decided to get married? Congratulations! Did you already plan for your wedding? You might want to plan your future before making any decision about your wedding.
I know in some cultures the marriage proposal is like a spontaneous and life-changing moment that happens when you’re least expected (at least the ones described on Facebook), a room full of rose petals and candles writing “will you marry me”. However, getting married is the more mutual and practical solution in international relationships. In another word, you might have to get married for convenience than for a fairytale love story. Sorry to break your bubble! Especially for Americans, bring your spouse to the U.S. is quite complicated.

Nonetheless, if you are planning to get married, you will have to have an idea for the next a few years. The marriage between two people with different passports isn’t that simple if you desire to live in one of your home countries and if you don’t have a work visa.
In our case, I’m from Korea and my husband is a U.S. citizen. For convenience, I will address the husband is American and wife is a foreigner in this post. Like us, if you are American and your wife is from a foreign country, think of where you two want to settle down. If you are planning to live in America, this post will show you the entire steps on how to bring your spouse to the U.S.
If you two want to settle in the U.S., there are two ways:
a) Get your fiance the K-1 non-immigrant visa from her home country that allows you to get married in the U.S. (entering the US under the visitor’s visa with an intention of marriage is not permitted). You will most likely go through the Adjustment of Status process.
b) Get married in your wife’s country and get her the immigrant visa to the U.S.
I know, getting married as an international couple can be complicated.
How to Bring Your Spouse to the U.S.: A Table of Contents
1. How to Bring Your Spouse to the U.S.: our story
2.Before starting the immigration process
a)Think long and hard why you want to move to the US
b)With a Lawyer or without a lawyer, that is the question: our story
3.Choose where you want to start the process.
a)Adjustment of Status – process within the U.S.
b)Immigrant Visa – process outside of the U.S.
2.File the visa application (DS-260) and Affidavit of Support
3.Collect the financial document
4.Collect the supporting (civil) document
7.Pick up your visa and the immigration packet
8.Enter the US within the 6 months
How to Bring Your Spouse to the U.S.: our story
We got married without knowing all this information, which we regretted a little while going through the process described below. That’s what inspired me to write this complex and intensive post describing each step. We got married in Korea, a beautiful Korean traditional wedding.
Read:
The Complete Guide to the International Marriage in Korea
The Complete Guide to Korean Traditional Wedding Ceremony
For us, choosing a country to live is rather flexible thanks to our work. But because of my desire to have a home, we needed to choose a place to settle down. But it wasn’t that simple: my husband can’t stay in Korea more than 90 days, I can’t stay in the US more than 90 days (and in fact entering the U.S. is a pain), and the rule is similar in most of the places outside of our home countries. We couldn’t just bounce from city to city every 3 months. It’s been awhile that I’ve been longing for some stability. Then, where to?

Immigration is a big decision, that everyone should think long and hard. We did. For the present and future of our business and career, we decided it would be more beneficial for us to start our life in the U.S. rather than Korea. What we do is not so relevant in Korea. The only thing that keeps me here in Korea is my family. We won’t be able to live near my parents but at least we will be living in the same country as my husband’s family.
So, we started the long and hard process to get me the immigrant visa known as the green card.
Our timeline
- Filed the petition: Jan 30, 2016
- Received a confirmation letter from NVC: Apr 25, 2016
- Sent Affidavit of Support and financial document: Nov 6, 2016
- Received a letter from NVC about a missing document: Jan 19, 2017
- Received a letter from NVC about processing our visa case: Jan 24, 2017
- Received a scheduled interview date from NVC: Feb 7, 2016
- Interview at the US Embassy in Seoul: Mar 6, 2017
- Sent a passport for visa: Mar 22, 2017
- Received a visa and final immigration packet: Mar 24, 2017
Total process: 14 months
Total fee paid: $1,550 (excluding postage)
*We deliberately took enough time to process the financial supporting document because we knew we were going for the IR, not CR. Read on for more detail.
Before starting the immigration process
Think long and hard why you want to move to the US
Staying in the U.S. with the green card means you can’t stay longer than one year outside of the U.S. Otherwise you will lose the green card and rights to live and work. Living with a condition like this is something to think about. Getting an immigrant visa means you are immigrating to this country, which is an obvious thing but it needs to be reminded time to time. It should be treated with a serious intention.

With a Lawyer or without a lawyer, that is the question: our story
We were incredibly intimidated by the whole process. We were a bit ‘unusual’ couple; we freelance (meaning, no steady income), we got married without knowing where we wanted to live, we were traveling a lot, and we had an intention to live in other countries other than Korea and America.
Everywhere I looked at, it seemed like I ‘had to’ have a lawyer for this process. My friends who went through the same process highly recommended it as well. It wouldn’t be a bad idea since we were not used to any of those lawyer jargon. I thought we would be especially bad at it. The U.S. Government didn’t seem like who would be generous for mistakes during the immigration process.
Then, how much it would cost? I didn’t even know where to start. I never needed a lawyer in my life! I just searched “immigration lawyer Seoul” and found a name. From that simple 30 minute face-to-face consulting (very intimidating by the way), I found out the process was overwhelmingly difficult, our situation was more ‘unique’ than I thought, and it would cost us about 3.5 million won ($3,150). She stressed that it was a starting price and it would go up by the difficulty of the case. And we were the difficult one.
You CAN do it without a lawyer (sorry, immigration lawyers!)
We had two more consulting sessions; one with a Korean lawyer in Alexandria who was recommended by my dad’s friend, and another at Catholic Charities that was recommended by my parents-in-law. The lawyer in Alexandria also firmly stressed that we had to have a lawyer for this process. The fee was similar, about $3,000 – $3,500. That was what he did every day after all, getting Korean couple the green card. But my gut said no.
Then we arranged another meeting with the Catholic Charities. My parents-in-law heard good things about the service in their church. The consulting fee was $60. Turns out, that was the best $60 we’ve ever spent. This was the only time that the lawyer really tried to help us rather than convincing us to be their customer. She assured that the process was long but doable if one of us was fluent in English and if we had 12 years of education. But the Catholic Charities only helps you for the Adjustment of Status process. Their fee was less than $500. Read below for more detail.
- Catholic Charities: https://catholiccharitiesusa.org/
We did without any help from a lawyer. But we had friends who helped us along the way.
Don’t be discouraged. You CAN do it without a lawyer and save $3,500 in the process. It will require a lot of your attention and time, but it is definitely doable. If we did, you can too. Also, you can hire a lawyer to look over your documents during the process.

Now, what’s next? Choose where you want to start the process.
- Adjustment of Status: process within the US
- Immigrant Visa – process outside of the US
Adjustment of Status – process within the U.S.
If you chose the a) method, you will most likely go through the process called Adjustment of Status. It’s done by filing I-485, Application to Register Permanent Residence and Adjust Status, after arrival to adjust status as a permanent resident of the United States.
This method is quite commonly used, even without getting the K Visa. The couple just enters the US with visitor’s visa, gets married, and files to adjust the status. It’s kind of using the gray area but it is the easiest and fastest if you don’t get caught when entering the US. Entering the US under the visitor’s visa with an intention of marriage or immigration is not permitted. So you will have to say something like “We came to visit my boyfriend’s family and we just decided to get married.”
One thing to remember is that you can’t leave the U.S. while this visa is processed, which is about 6 months. If you are required to travel overseas frequently for work or otherwise, this method is not recommended.
After long and hard consideration, we decided to process from Korea, my home country.

Immigrant Visa – process outside of the U.S.
So, you are married outside of the U.S. and wish to move to the USA, yes?
It’s time to start the process to bring your spouse to the U.S. The immigration law allows U.S. citizens to petition for certain qualified relatives to come and live permanently in the United States. Eligible immediate relatives include the U.S. citizens:
- Spouse
- Unmarried child under the age of 21
- Parent (if the U.S. citizen is over the age of 21)
Which is it: CR-1 or IR-1?
If you are getting your wife an immigrant visa, which allows her to receive a green card to the U.S., I recommend two time period: either process the visa application as soon as you are married or wait until the 2 year wedding anniversary. Since the process takes about 1 year anyway, it makes sense to go for the IR, if you are not in hurry to enter the U.S.
Read: What are CR-1 and IR-1?
If you are married under two years, you’ll apply and receive CR-1, conditional residence, also known as the temporary immigrant visa. The most inconvenient account will be when you are traveling out of the US. Each time you are exiting and entering, you will have to go through an interview process and you need to get the entry permit before your travels. The two-year anniversary date of entry is the date of expiration on the temporary alien registration card (green card). To remove the conditional status, you and your spouse must apply together to USCIS within the ninety days before the two-year anniversary of your spouse’s entry into the United States on his or her immigrant visa. Only then you will receive the permanent green card, that’s good for 10 years and has no requirement for working and traveling.
If you wait to get the green card after two-year wedding anniversary, you can skip the conditional process and go for the permanent immigrant visa, IR-1 (immediate relative). We went for IR-1.
Getting an immigrant visa takes about 1 – 1.5 year. Consider this in your time frame.
File a petition (I-130)

This petition is saying “Please let my wife immigrate!” to your government. Just being married to you isn’t good enough to bring your spouse to the U.S. to live and work. This is the first step of the formal immigration process. The petition I-130 is actually (surprisingly) quite simple. Don’t forget to file two Form G-325A, Biographic Information: one for you and one for your spouse. At this stage, you also have to file the proof of your relationship, such as letters, emails, flight tickets (that you traveled together), photographs, and so on. Your wedding invitation and photos from the wedding are an effective proof. We sent our article on Yahoo Travel, Expedia, and our blogs, as well as wedding photos and invitation.
You can apply to receive an email from the USCIS. It’s a good way to keep tracking the process.
- Fee: $535 (currently, March 2017)
- What to send: I-130, G-325A (for both you and your spouse), proof of relationship, fee
- Where to file: there are different USCIS offices depending on where your permanent home address is. Please visit this page to see where to send your petition.
- Processing time: about six months to approve
File the visa application (DS-260) and Affidavit of Support
About the time that you forgot about your petition, you will receive an email from National Visa Center (NVC). Congratulations! Now it’s time to get into the real process. The case number and invoice ID number are needed for the rest of the visa process, so keep it close with you.
First, file the fees.
1) Immigrant Visa Application Processing Fee: $120
2) Affidavit of Support Fee: $325
Go CEAC and login using your NVC Case Number and Invoice ID.
It will take about one week until the payment goes through. When you receive the payment confirmation email now is the time to move on to the most crucial state of your visa application.
There are two different steps for this stage.
1) File the visa application DS-260 online

This is your formal application for the immigrant visa. This is done online. It has a lot of pages, so plan a plenty of time to get to it. It’s asking the personal information, such as mother and father’s birth place and date and places that you lived since 16 years of age. You can save after each page before moving on.
2) Affidavit of Support (I-864)

The Affidavit of Support is a contract between a sponsor and the U.S. Government. By signing Form I-864, the supporters (spouse or otherwise) are agreeing to use the resources to support the intending immigrant, if it becomes necessary. This is effective until the immigrant gives up the immigrant status or become the US Citizen.
To become the sponsor, you must show on this affidavit that you have enough income and/or assets to maintain your household at 125 percent of the Federal Poverty Guidelines. If your income doesn’t qualify this requirement, you will have to get a joint sponsor or other sole financial sponsor. Anyone who has the US Citizenship is eligible to be the sponsor. Or the intending immigrant can be the sponsor if the requirement meets. Visit this page to see what to do in different kind of situations.
For us, my father-in-law became the financial sponsor. We found out this is one of many usual scenarios of this Affidavit of the Support process. It’s also acceptable to have a sponsor who is retired if he or she has sufficient income/savings to support the intending immigrant. In this case, the spouse files I-864, the financial sponsor (my father-in-law, in this case) files I-864, and my mother-in-law files I-864A. The Form I-864A is a Contract Between Sponsor and Household Member, which means she agrees to be the joint sponsor to my immigration process with my father-in-law because they co-own their properties and finances.
3) Collect the financial document
The financial document is required to show the financial sponsor has sufficient income/savings. In our case, my husband didn’t have to file these. My father-in-law and mother-in-law prepared all the financial documents (a lot of work! Thank you, Mom and Dad).
- IRS Tax Transcript
- Evidence of Income
- Proof of Relationship
- Proof of domicile
- Proof of U.S. status
- Proof of Assets
4) Collect the supporting (civil) document
This is for the intending immigrant. The civil document requirement is different for each country, make sure you are checking the right page.
In general, these are the document you need to collect:
- Birth Certificate
- Criminal Records
- Marriage Certificate
- Photocopy of the Passport
For Korean citizens, this is the list of document need – and you will need to translate everything. Translation doesn’t need to be done by a professional. I know some people pay a lot of money (like $100 per page!) for this but, don’t! All you need is the right form and a sentence at the end of the document to assure the U.S. Government.
- Basic Certificate (기본증명서, link to Korean form)
- Family Relation Certificate (가족관계 증명서, link to Korean form)
- Marriage Certificate (혼인 증명서, link to Korean form)
- Criminal Record (범죄경력 회보서)
- Where to send: the email from NVC has all the information. The cover letter from NVC should go in front of all these supporting documents.
- Processing time: around two months
Schedule an interview
When the NVC processes all the supporting documents, they send you an email that they will be scheduling an interview with your local embassy. Now you are almost there! In a week or two, they will email you again with the scheduled date and interview confirmation letter. The interview is usually scheduled one month in advance. You can reschedule if you can’t make it.
But it’s not over yet.
Once your interview date is scheduled, you have to prepare another round of supporting documents. See here what is required depending on your citizenship.
1) Medical examination
The U.S. Government requires a specific health record. You’ll have to get the medical examination from the pre-approved medical centers in your country. It includes blood and urine test, chest x-ray, and immunization. I ended up getting four immunization shots at once (MMR II, chicken pox, T-dap (tetanus), influenza) and I have to say it wasn’t a pleasant experience.
Items to bring to your medical examination:
- Your visa interview appointment letter,
- Your passport,
- Five (5) recently taken passport sized color photographs,
- A copy of your immunization records, and
- Your current email, address and zip code; intended U.S. address with the zip code; and prior countries of residence

How much is it?: It costs me about 400,000 won from Severance Hospital in Sinchon, Seoul. It varies roughly between $250-350. The price depends if you have to get the additional immunization.
What’s next?: The result comes in a sealed envelope. DO NOT OPEN IT. Bring the sealed envelope to your interview. The hospital might give you the CD contains x-ray and immunization record. Bring them with you when entering the US.
2) Gather the supporting document
Yes, another round of supporting document is needed. It just never ends, feels like. But you are nearly there.
3) Register for the delivery service
Here, correctly enter your address for the passport delivery. In Korea, there are two options: get it deliver to your home or pick up at the delivery company. Since I live in a convenient location, I chose to pick up rather than the delivery service in case I won’t be home to receive.
4) Pre-interview checklist
Make sure you have everything for the interview!
* A copy of your NVC interview letter (does not apply to Diversity Visa, fiancé(e), adoptive, or asylee/refugee applicants).
* Unexpired passport valid for eight (8) months beyond your intended date of entry to the United States.
* Two (2) color passport-size photographs of each person applying for a visa (5 cm x 5 cm, or 2-inch x 2-inch). Please review our online photo requirements.
* Confirmation page from the Form DS-260 Application for an Immigrant Visa you submitted online at ceac.state.gov/iv.
* Confirmation page from your online registration with our passport return service.
* Your original birth certificate, English translation, and a photocopy. NOTE: If you were born in Korea, submit both the Basic Certificate and Family Relation Certificate issued within one (1) year for each applicant.
* Medical examination results in a sealed envelope (if the physician gives you these results).
* The appropriate Form I-864 Affidavit of Support for each financial sponsor along with a photocopy of the sponsor’s IRS transcript or most recent U.S. federal income tax return, and any relevant W-2s.
* Proof of your U.S. petitioner’s status and domicile in the United States (photocopy of a U.S. passport, naturalization certificate, or lawful permanent resident card).
* Evidence of the relationship between the petitioner and visa applicant (such as photographs, letters, or emails).
* If you are married: Your original marriage certificate, English translation, and a photocopy. NOTE: If you are of Korean nationality, submit a Marriage Relation Certificate and English translation.
* If you are older than 16 years of age: You must obtain a police certificate from your country of nationality and your country of current residence if your presence there was for six (6) months or more after age 16. Police certificates from other countries are required if your stay was for 12 months or more after age 16. You can find police certificate requirements for various countries online. If you have ever been arrested, court records with English translations should also be submitted.
Interview

It’s the interview day, the moment you’ve been waiting for last year and a half! It’s finally here. Nervous? Don’t be. This is the final confirmation stage to see that you’ve submitted all the necessary documents, check your relation status, and ask a few questions. Of course, the interview process will be different in each country.
Our interview was done only in a few minutes. The interview at the US Embassy in Seoul is done over the counter. It was quite different than what I imaged, sitting in an interrogation room I saw on TV. But nope, it was actually quite pleasant. The petitioner isn’t required (aren’t allowed in some cases) but it’s a good go together. In our interview, the consulate actually had more questions to my husband than to me. His focus was to see our relationship is real (questions about my in-laws, how we met, etc.) and if we had any plan in the US. He even said that our visa process would only take about 5 working days. It was a big relief.
If any of the necessary documents are missing, the consulate reschedules the interview or let you submit the missing document in following days. I was instructed to come back in two weeks because we were going for the permanent green card (IR-1) and it was two weeks before our official marriage registration day. I held onto my passport and went back to the embassy in two weeks as instructed. It only took them two days to process my visa.
During the interview, they might give you back the supporting document you already sent with the petition and Affidavit of Support. It’s a good idea to hold on to it until you successfully immigrate.
Pick up your visa and the immigration packet
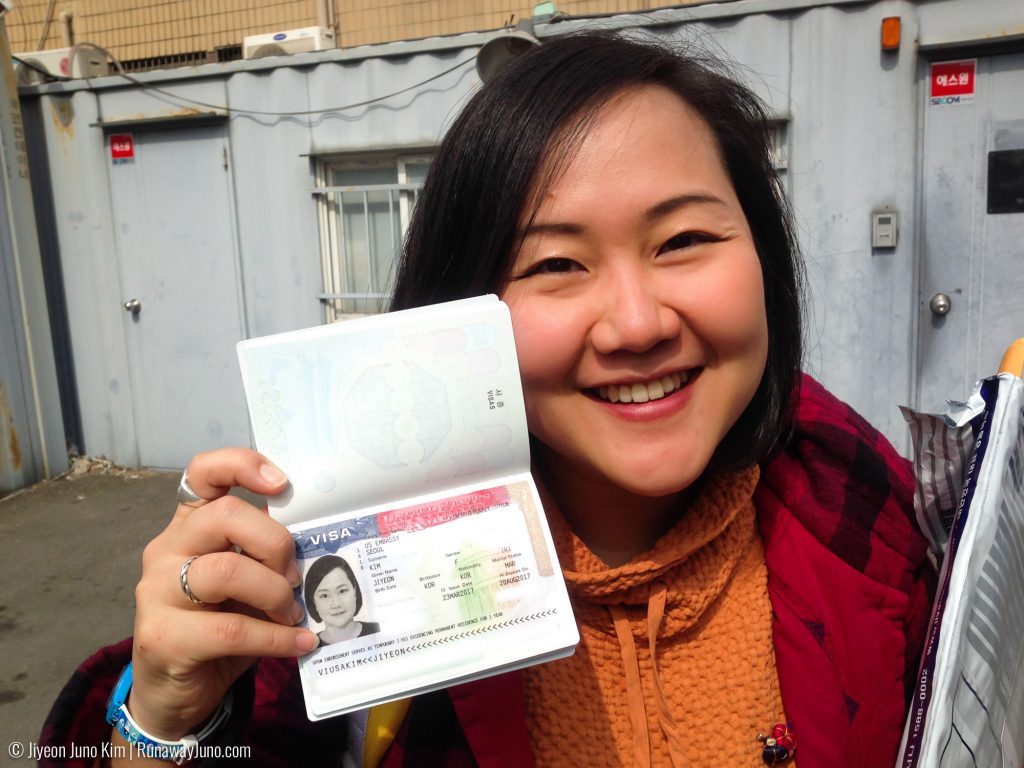
I got a text message from the delivery company and an email from the US Travel Doc that my visa was ready and shipped to the designated address. Just like that, I had the visa! I went to this (what seems to be a random) location and picked up a huge packet. There was the visa on my passport (so pretty!) and yet another sealed envelope. This will be given to the border control at the airport when I enter the US.
Enter the US within the 6 months
An immigrant visa is usually valid for up to six months from the date of issuance unless your medical examination expires sooner, which may make your visa valid for less than six months. My medical examination was Feb 20 and it was scheduled to expire on Aug 20, which makes my visa expires on the same day. Make sure to enter the U.S. before the visa expires. Otherwise, you will have to go through the same process all over again.
What to bring:
- Your passport with the immigrant visa
- The big yellow packet (DO NOT OPEN)
- The x-ray CD
One last thing: pay the fee (again!)
You must pay the USCIS Immigrant Fee to U.S. Citizenship and Immigration Services (USCIS) $220 after you receive your immigrant visa and before you travel to the United States.
Remember, this isn’t the final step in your immigration process. There is always a chance that your entree can be denied at the border.
Entering the United States

With your immigrant visa (before it expires), and sealed packet, you will travel to a U.S. port-of-entry (often an airport) and request permission to enter the United States. A visa does not guarantee entry into the United States. The Department of Homeland Security, U.S. Customs and Border Protection (CBP) officials have authority to grant or deny admission.
When you are admitted, you will enter as a Lawful Permanent Resident, also called a green card holder, and will be permitted to work and live permanently in the United States.
When You are a Permanent Resident – Coming to the United States to live permanently, you will want to learn more about your status as a Lawful Permanent Resident. See Welcome to the United States: A Guide for New Immigrants to review information on the USCIS website about living in the United States.
Social Security Number – To learn about the U.S. Social Security Administration benefits available to Legal Permanent Residents, and how to apply for a social security number card, visit the Social Security Administration website.
About Visa Denials
- In some situations, the consular officer does not have sufficient information needed to process your application to the conclusion, or you may be missing some supporting documentation. The consular officer will inform you if information or documents are missing and how to provide it.
- Some applications may require additional administrative processing after the interview before the application can be processed to conclusion. The consular officer will inform you if additional administrative processing is necessary.
Based on U.S. law, not everyone who applies is qualified or eligible for a visa to come to the United States. Under U.S. law, many factors could make an applicant ineligible to receive a visa.
Once you are in the U.S…
I haven’t done this process yet but this is what they say: It normally takes several months for DHS to process and send the alien registration card to you. In the interim, the passport stamp permits employment and travel until the card arrives. You may depart and return to the US before you receive the alien registration receipt card, as long as the DHS stamp in your passport has not expired. Should you wish to leave the US and your stamp has expired and you have not yet received your alien card, you should contact DHS in the US BEFORE departure to ensure permission to return to the US. Otherwise, you will not be allowed to board the plane to return to the US.
Congratulations, and enjoy your new start in the United States!

FAQ
I only have a few pages left on my passport. Can I make a new passport during the visa process?
To avoid any confusion, I waited until the interview. I got a new passport right before the interview and brought my old and new passport together. A passport is just a form of an identification, so it doesn’t matter as long as if you have an unexpired passport.
When do I have to enter the US?
It’s usually within 6 months from the date you received the visa but it depends on the expiration date of your medical record. For example, if your medical record is only good until August 20, you will have to enter before that even though you received your visa on March 30.
